+-

Author Topic: Lt500 rebuild.  (Read 1448 times)

Offline

  • Trade Count: (0)
  • Newbie
  • **
  • Posts: 24
Lt500 rebuild.
« on: August 22, 2013, 11:05:32 pm »
Well figured i would throw my zilla rebuild up.


I've been working on this thing on and off for about four years now. Just recently got a new job and I have a little extra time on my hands to give this zilla some love it deserves.


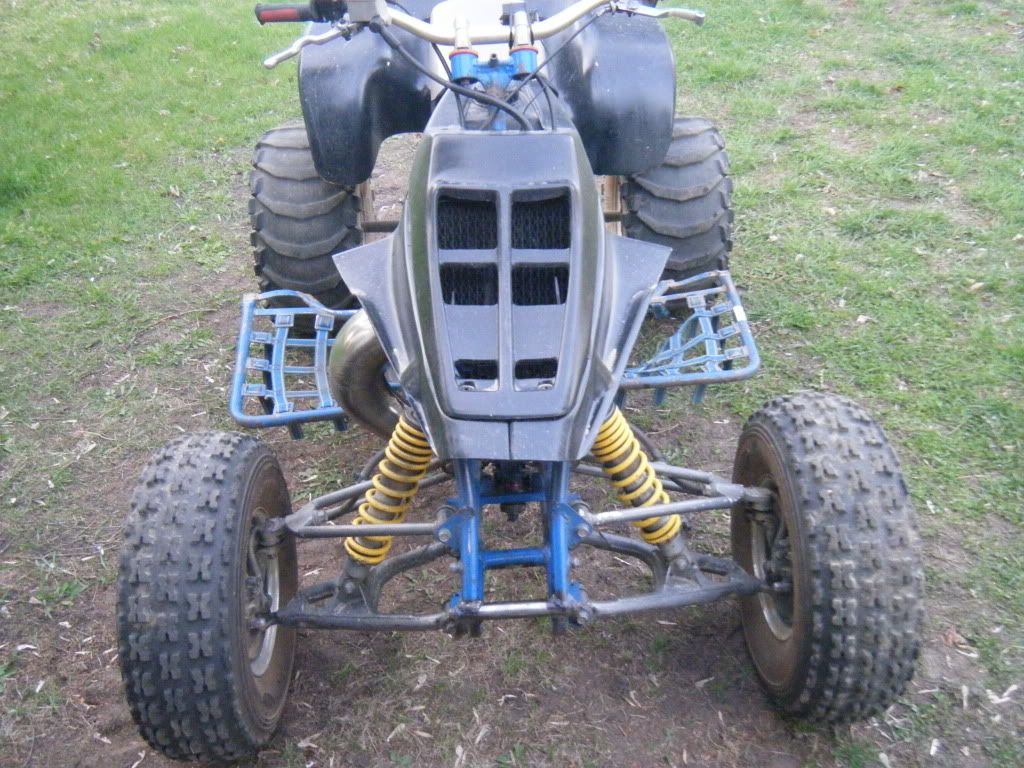
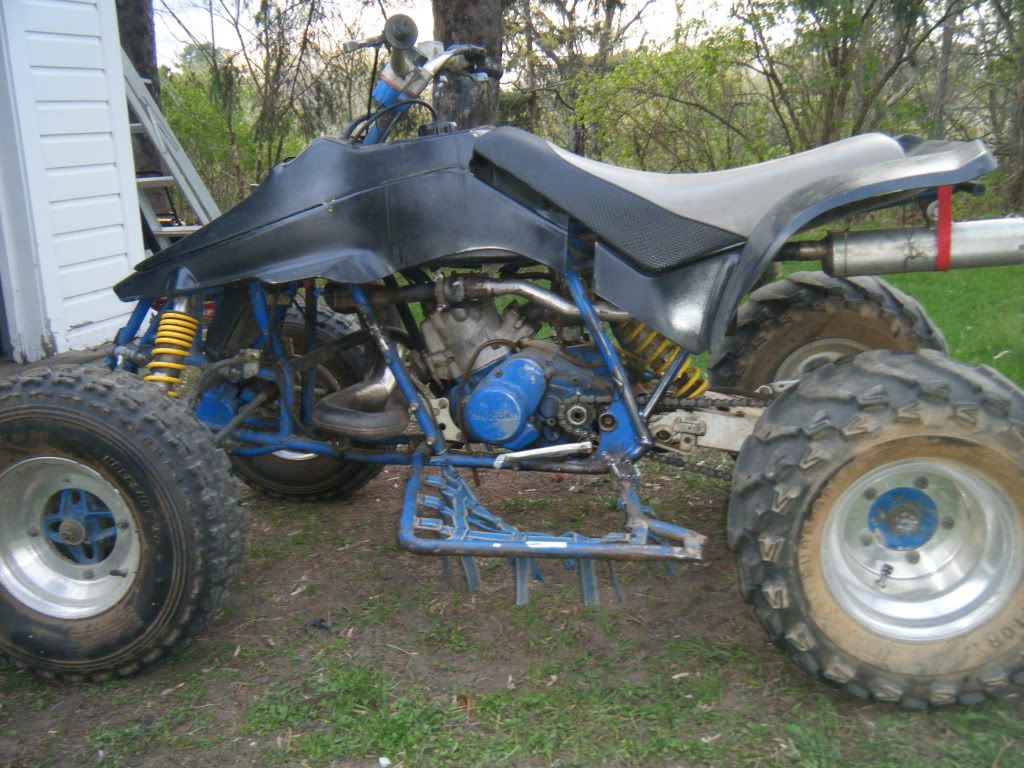
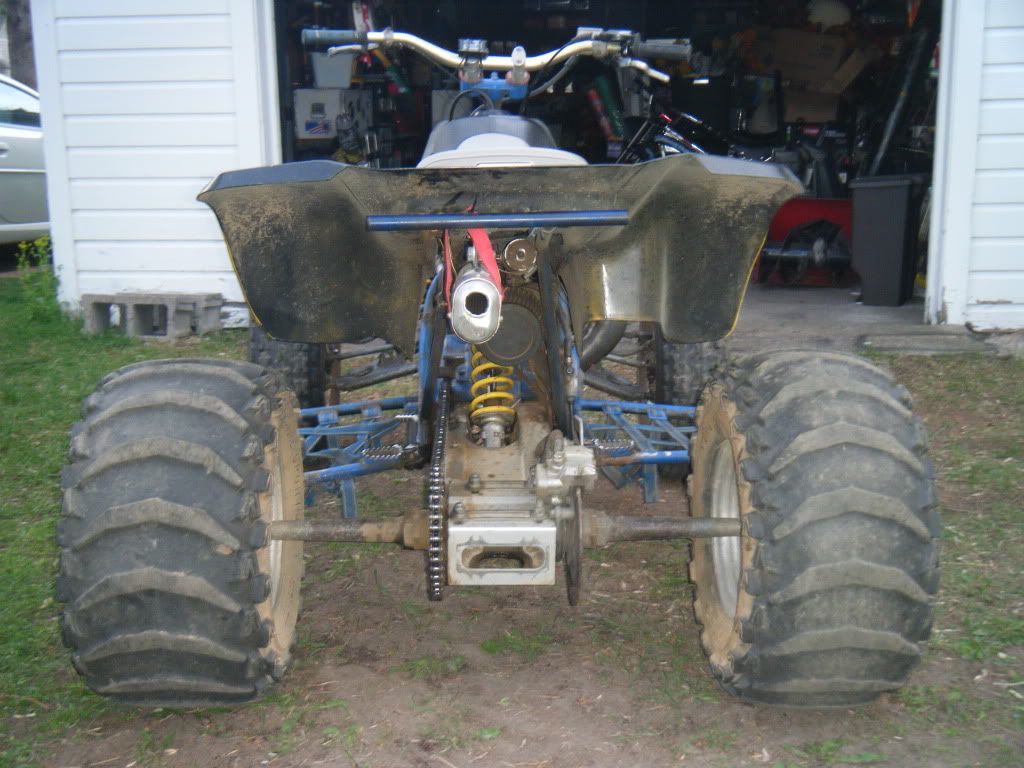
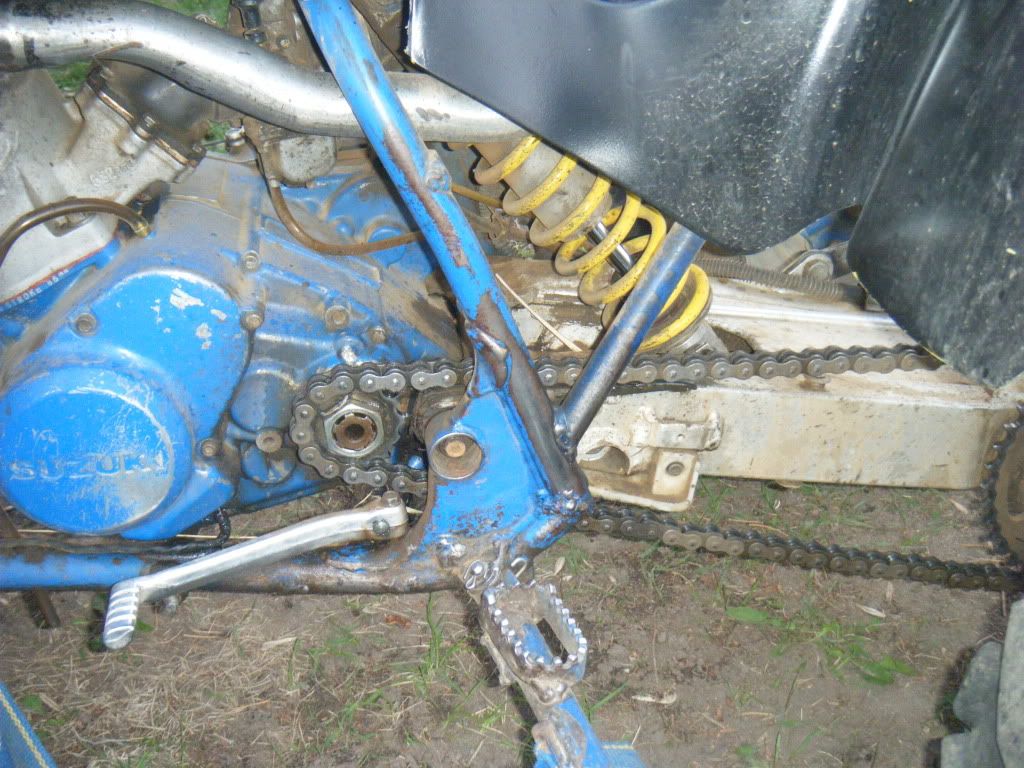
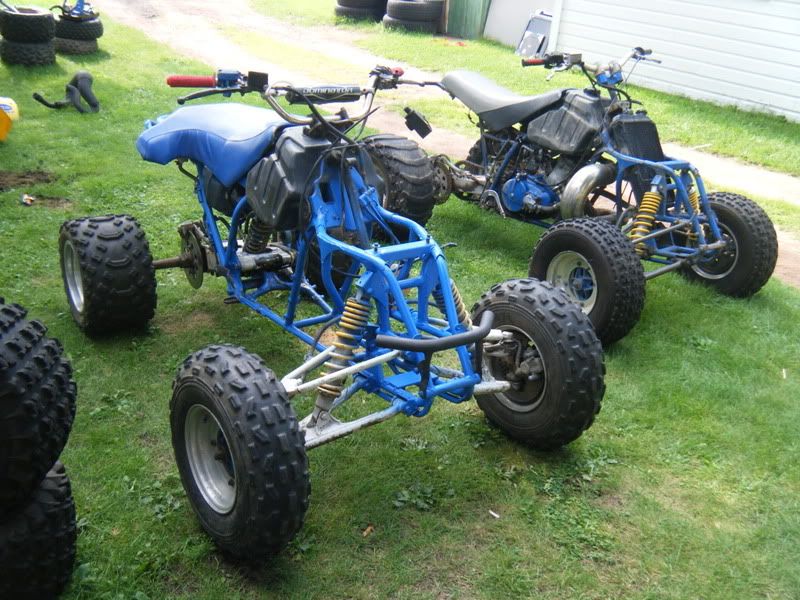
I bought the bike almost 7 years ago now i paid $1500 for it. There was a lot wrong with the bike, the frame was all hacked up. the pipe was barely holding on and all shocks were nearly blown and the frame was rusting from the inside out. It really had only one thing going for it and that was the motor,  It ran strong! I rode the **** out of the thing for almost a year actually, never let me down once.


Here's some pictures of what the bike originally look like when I bought it


Went ahead and bought a roller right away for $500 drove over 600 miles for it. the other chassis was far from repair.


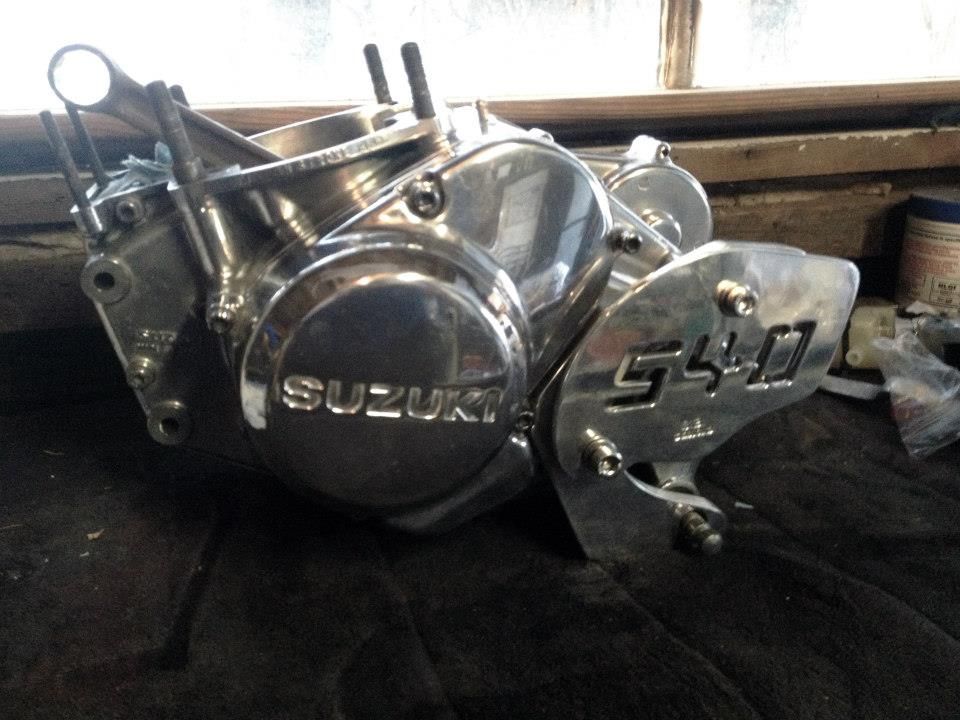
Than i pulled the motor from the bike. Started cleaning it up right away.


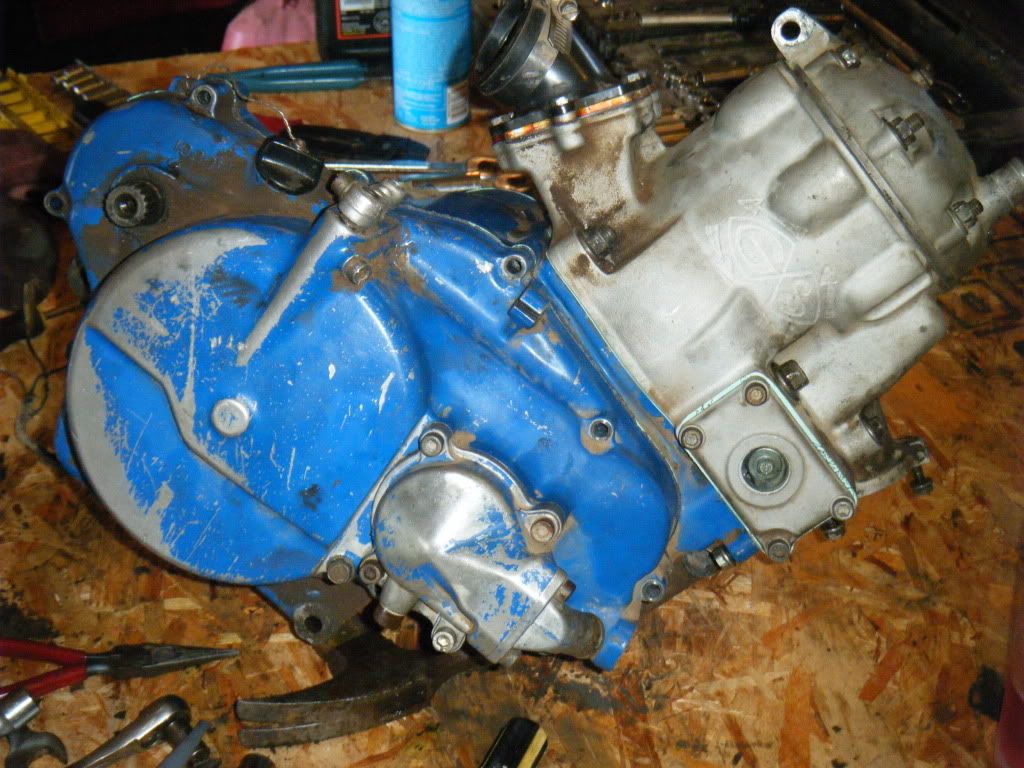
I tore the whole bottom end apart. sent the hole thing out for cryo- treating. Rebuilt the crank installed new bearings and had the transmission back cut. also put in about a weeks work of polishing the entire bottom end.


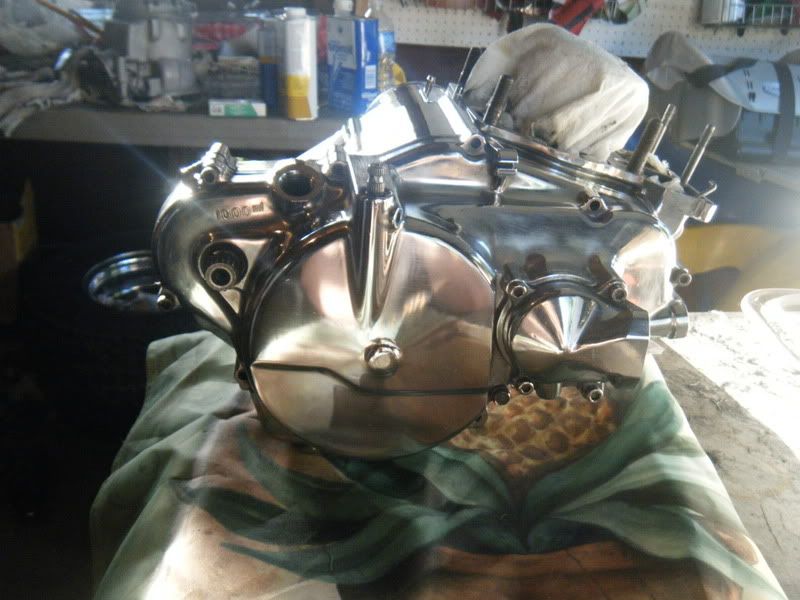
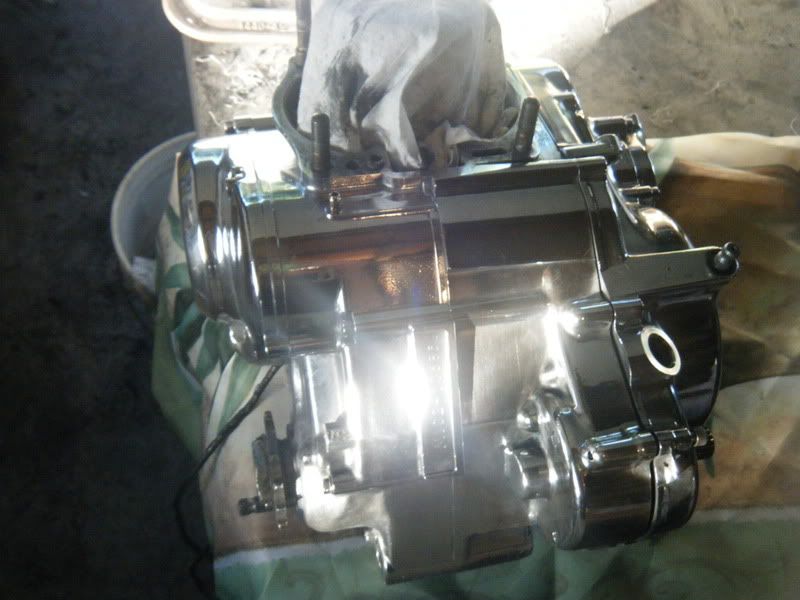
this is how she sits today. Im still on the look out for a decent 87 big reed cylinder for this bottom end. and sorry for the crappy cell phone pics doesn't do it justice.


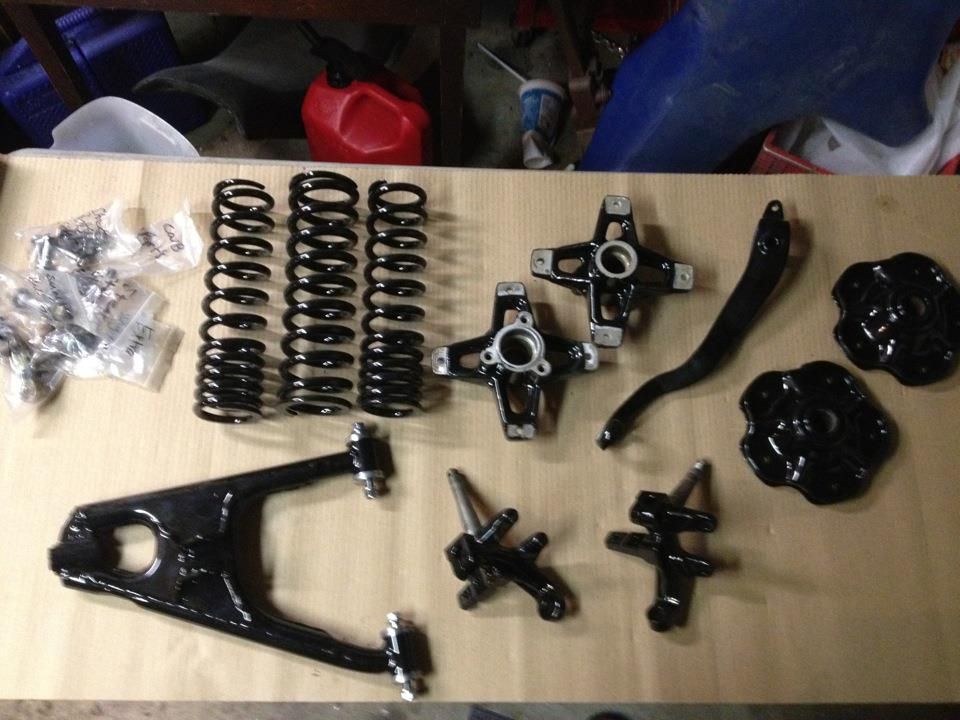
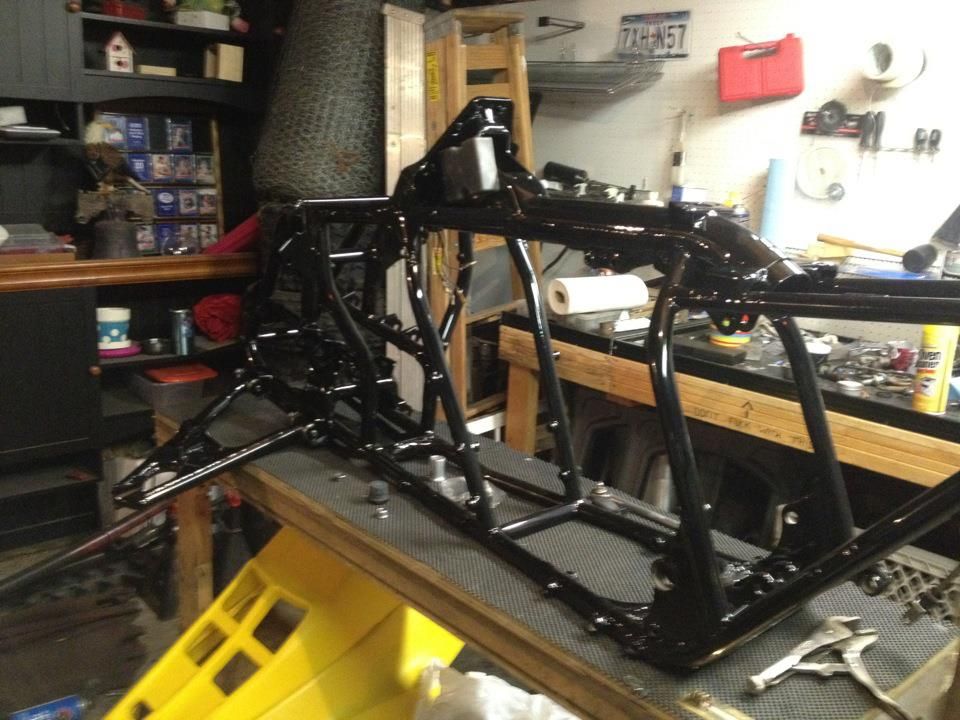
Sent the frame and parts in for powder coating.


than started putting back together what i could.


still waiting on some parts to finish up the front end, rotors,brake, fuel lines etc.

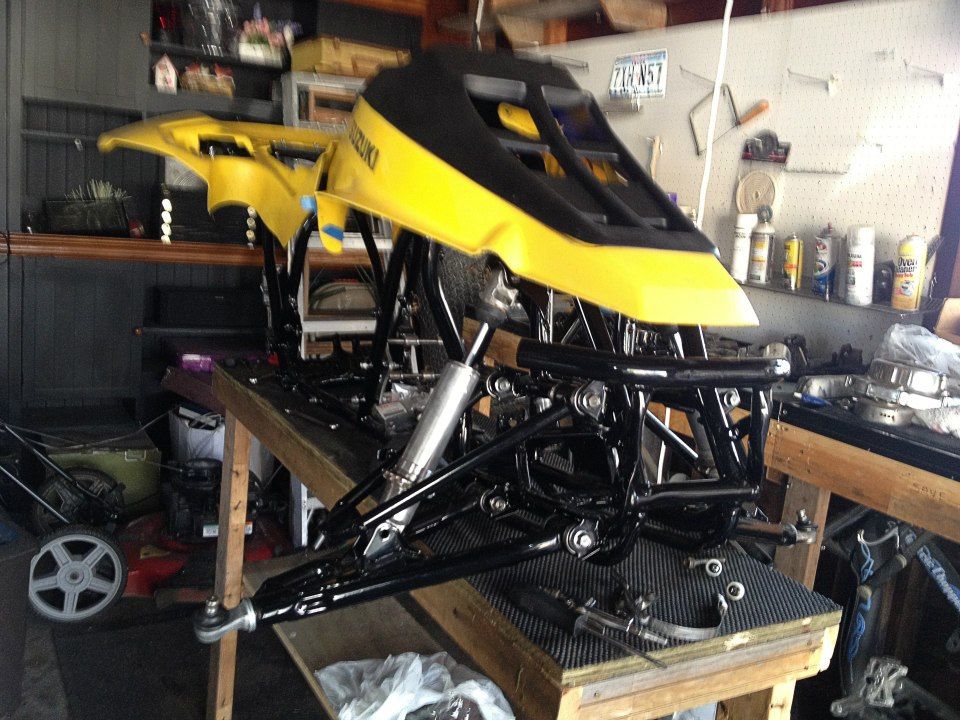
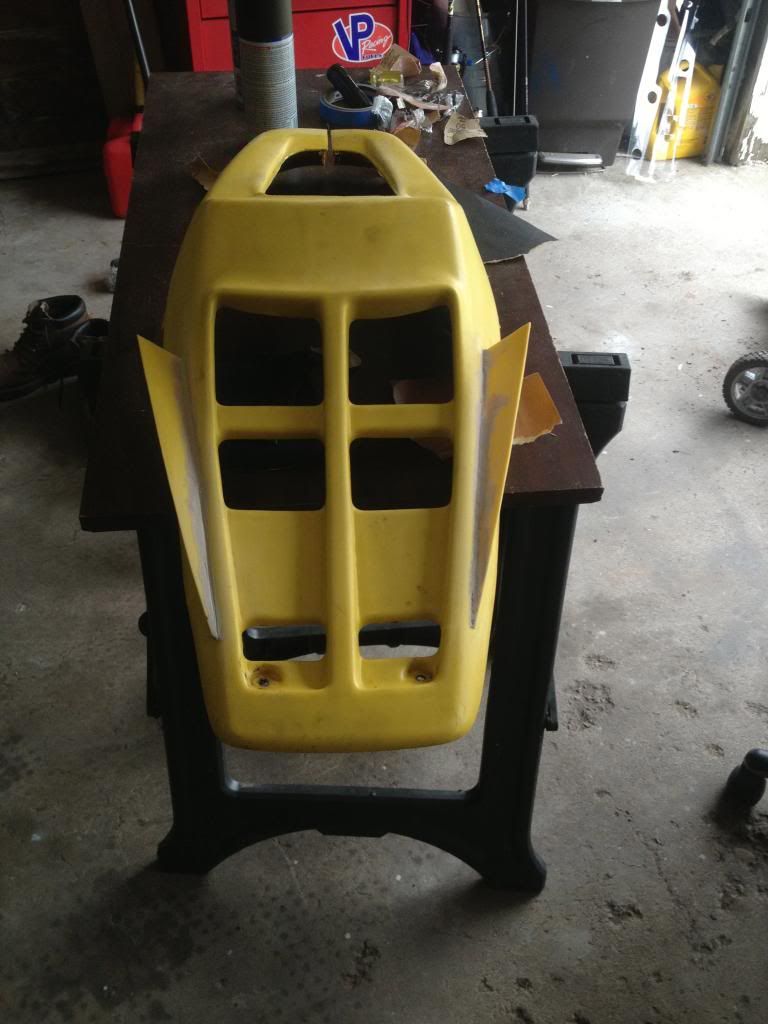
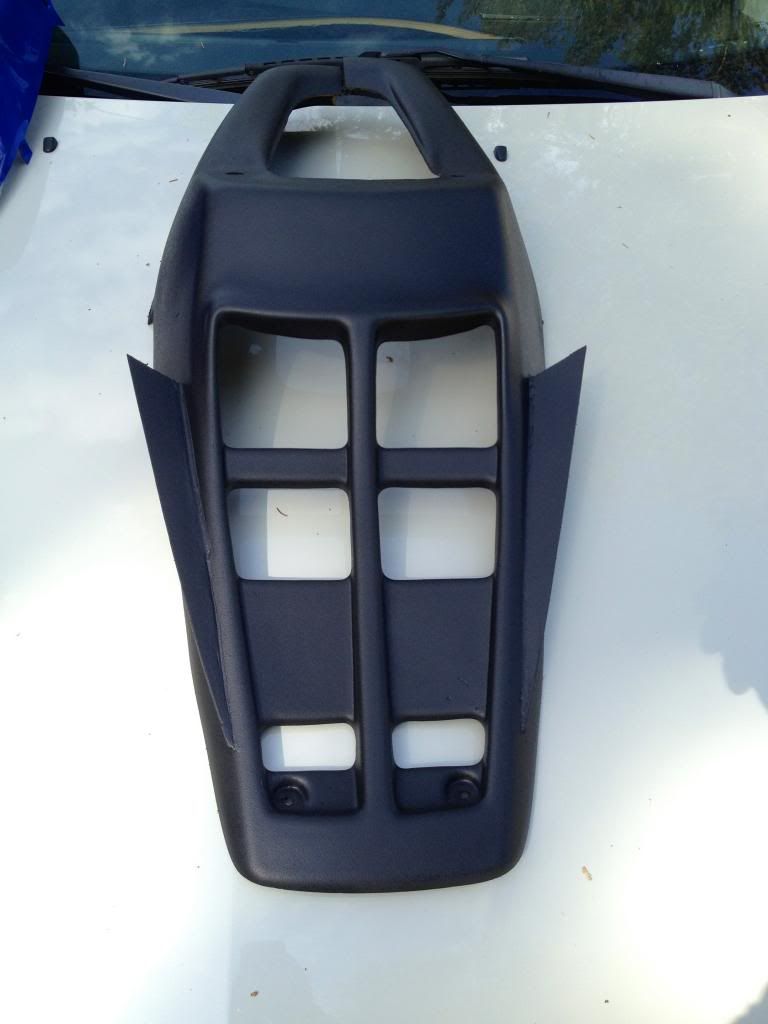
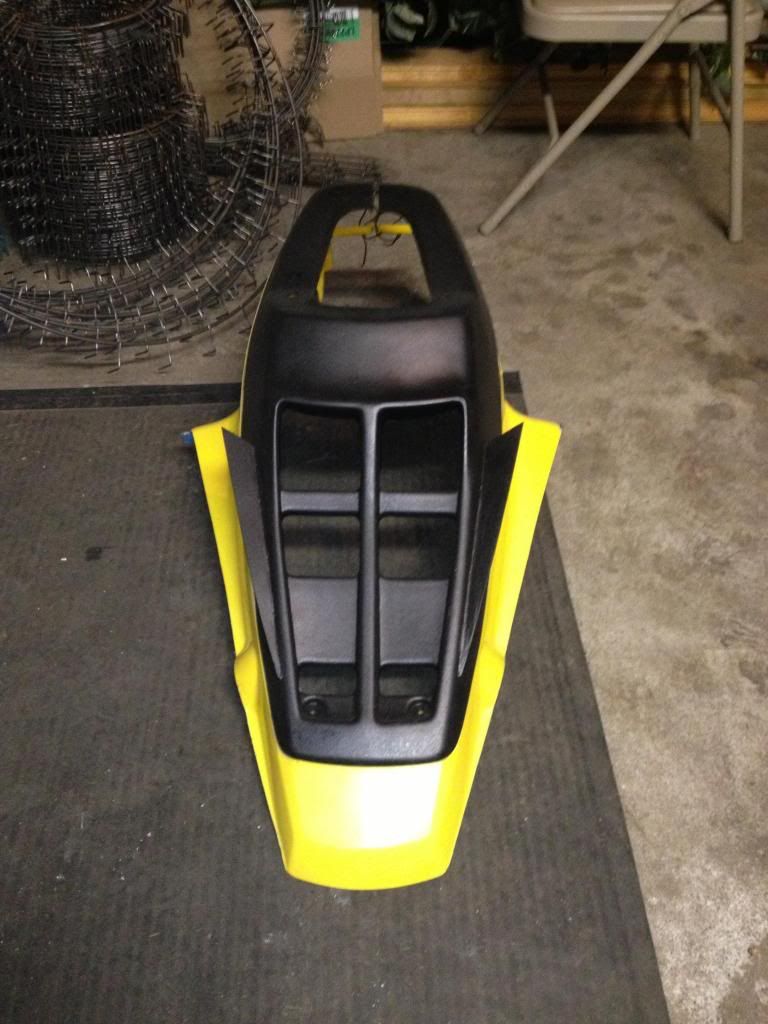
Also did some custom Fender work. Added some fins to the front hood. i think it turned out awesome!


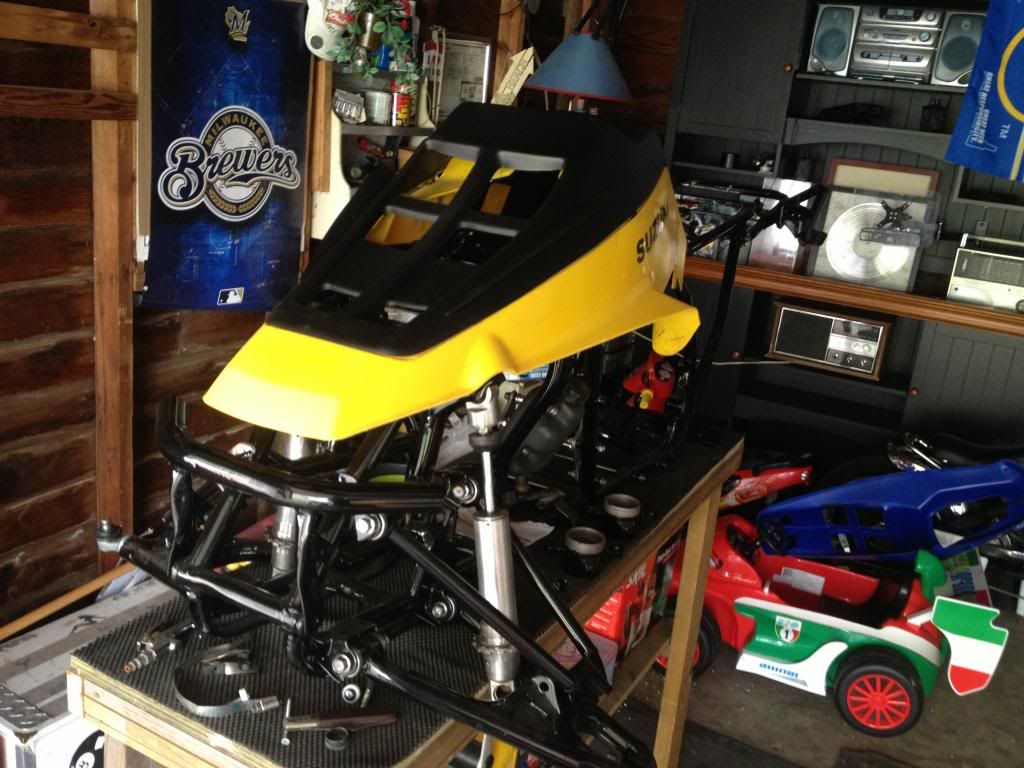
This is how the bike sits as of now. I'm no where Close of getting this bike done still have to finish up the rear end and find me a decent cylinder.  I'm very happy as how far this bike has come! i will try to keep this thread up-to-date as best as I can. And thanks to everyone on this site for all the helpful information about these old dinosaurs.


Thanks for looking Tyson.

Share on Bluesky Share on Facebook


Offline

  • Trade Count: (0)
  • Pro Member
  • ********
  • Posts: 984
  • Gender: Male
  • Location: Detroit, mi
Re: Lt500 rebuild.
« Reply #1 on: August 23, 2013, 03:34:35 am »
Brother thats looking awesome...... P*
Ain't ever seen it......but I have heard it.

Offline

  • Trade Count: (0)
  • Elite Member
  • **********
  • Posts: 1287
  • Location: Ontario,Great White North
Re: Lt500 rebuild.
« Reply #2 on: August 23, 2013, 05:25:05 am »
Lookin good.Now I don,t feel so bad that mine has been sitting is pieces for a long time as well. ^-^Mine is PC,d black as well but not near as clean as yours.The black and yellow on yours looks awesome.Keep the pics coming.Did you PC the swinger or are you going polished aluminum?
Can,t fix stupid.:)

Offline

  • Trade Count: (0)
  • Forum Moderator
  • Elite Member
  • *********
  • Posts: 2058
Re: Lt500 rebuild.
« Reply #3 on: August 23, 2013, 06:40:27 am »
Nice...  (Y)

That polished engine looks killer  +k2
87 HPR LT500
04 Roll LOBO II TRX250R
06 LTR450
87 LT500
85 & 86 LT250
86 & 87 TRX250R
07 & 09 Husqvarna TE450
00 CR125R

Offline

  • Trade Count: (0)
  • Elite Member
  • **********
  • Posts: 2493
  • Gender: Male
  • Location: Cincinnati OH
Re: Lt500 rebuild.
« Reply #4 on: August 23, 2013, 07:43:21 am »
That engine is bling bling as hell!!! I like the personal touch on your hood with the fins I had my body guy paint my hood and even with adhesion promoter and sanding and primer paint still chipped so my dads doing a carbon fiber vinyl wrap on my hood.

Offline

  • Trade Count: (0)
  • Forum Moderator
  • Elite Member
  • *********
  • Posts: 1389
  • Gender: Male
  • Location: NWA
Re: Lt500 rebuild.
« Reply #5 on: August 23, 2013, 11:21:24 am »
Yea, the hood looks good now but it chip super quick.  Might try hydro-graphics.

Offline

  • Trade Count: (0)
  • Newbie
  • **
  • Posts: 24
Re: Lt500 rebuild.
« Reply #6 on: August 23, 2013, 03:10:07 pm »
Lookin good.Now I don,t feel so bad that mine has been sitting is pieces for a long time as well. ^-^Mine is PC,d black as well but not near as clean as yours.The black and yellow on yours looks awesome.Keep the pics coming.Did you PC the swinger or are you going polished aluminum?
  At the moment I don't have a swingarm for this bike. Looking at a metal tech +4 and it will be Chrome.

Nice...  (Y)

That polished engine looks killer  +k2
  Thanks man!

And Q2W its not actual paint. its plasti dip the stuff is surprisingly very durable, doesn't chip and it's very flexible.  Eventually i would like to get it hydro dipped but for now it does the job.

Spent a little more time in the garage today. Started polishing the sides of the radiator its still not where i want it but its getting there.

I won't be satisfied with it until it looks like a mirror  8)


Offline

  • Trade Count: (0)
  • Elite Member
  • **********
  • Posts: 2493
  • Gender: Male
  • Location: Cincinnati OH
Re: Lt500 rebuild.
« Reply #7 on: August 23, 2013, 03:26:42 pm »
Did you paint your overflow bottle? If so what did you use?

Offline

  • Trade Count: (0)
  • Newbie
  • **
  • Posts: 24
Re: Lt500 rebuild.
« Reply #8 on: August 23, 2013, 04:51:00 pm »
i used rit dye for the over flow.

Offline

  • Trade Count: (0)
  • Range Rover
  • *****
  • Posts: 589
  • Gender: Male
  • If they can't kick start it--they cant ride it
  • Location: Utah
Re: Lt500 rebuild.
« Reply #9 on: August 23, 2013, 05:22:47 pm »
How do you use rit dye.. Heard of it but never used it.  Did you dye the inside our outside or both?  Bike looks great>
If they can't kick start it--THEY CAN'T RIDE IT

Offline

  • Trade Count: (0)
  • Newbie
  • **
  • Posts: 24
Re: Lt500 rebuild.
« Reply #10 on: August 23, 2013, 06:21:09 pm »
well first you need to prep the surface of the bottle.  i scrubbed the hole thing with acetone than scuffed up the bottle with 1500 grit sand paper to help the dye soak in better. than just throw it in a big pot of boiling water and rit dye mix and let in sit for a few hours and your done. 


hope this helped Tyson

Offline

  • Trade Count: (0)
  • Range Rover
  • *****
  • Posts: 589
  • Gender: Male
  • If they can't kick start it--they cant ride it
  • Location: Utah
Re: Lt500 rebuild.
« Reply #11 on: August 23, 2013, 09:21:56 pm »
Cool, I had no idea you could do that.  It gave it a unique smoked look, I like it.
If they can't kick start it--THEY CAN'T RIDE IT

Offline

  • Trade Count: (0)
  • Newbie
  • **
  • Posts: 21
Re: Lt500 rebuild.
« Reply #12 on: August 29, 2013, 11:29:12 am »
i have a couple of questions for ya.

cyro treating; i looked it up, i had assumed what it was, but in this case what was your motive for doing this? the process works on cast aluminium to keep it stronger?

porting/cc on the motor. i see a "540" chain gaurd and some weird engraving on the jug. care to explain?  is it sleeved? stroked? or bored?


why are you getting your trans cut? is it hard to shift? i know my 95hp cheetah had issues under full load shift and it may be the reason why im parting it out. i already knew i could just have it cut and the problem would be solved but i have other reasons as well. explain what your going for.

Offline

  • Trade Count: (0)
  • Green Horn
  • ***
  • Posts: 50
Re: Lt500 rebuild.
« Reply #13 on: September 18, 2013, 09:01:36 am »
nice build.  im currently redoing a 89 zilla i just picked up.  any updates?

Offline

  • Trade Count: (0)
  • Green Horn
  • ***
  • Posts: 97
Re: Lt500 rebuild.
« Reply #14 on: September 27, 2013, 07:03:21 am »
Damn that looks great!!!!
Love the hood mod


+- Suzuki Quadracer HQ Store Zone

http://www.suzukiquadracerhq.com/index.php?action=store